Project Overview
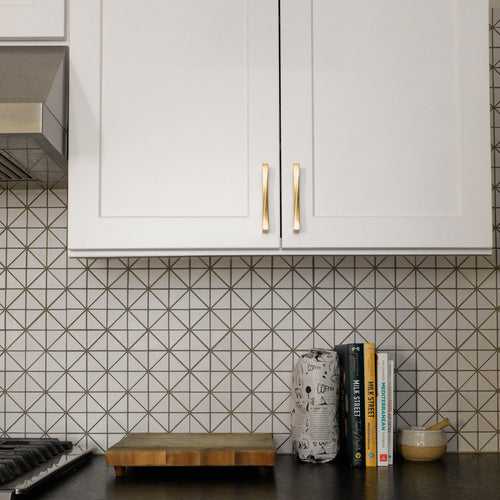
One of the quickest and simplest ways to update the look of your furniture or cabinetry is to swap old hardware for new. In this how-to guide, we'll walk you through the steps for doing a quick swap or drilling new holes and fitting new hardware.
When you're ready to start, follow the guide below for step-by-step instructions. P.S. Don't forget to snap a before photo of your space to capture your transformation!
Tools and Materials You Will Need
Installing cabinet handles is simple with the right tools. You will need the following items.
- A drill with a 3/16-inch bit
- A screwdriver
- A tape measure
- A pencil
- A hardware jig or template
- A level
- A roll of painter’s tape
- Your selected handles or pulls (from Hapny Home of course)
- Optional tools like an awl, protective glasses, and wood filler can help make the process even smoother.
How to Measure and Mark for Perfect Placement
On Cabinet Doors
Place handles opposite the hinges. For wall cabinets, position them 2 to 3 inches from the bottom corner. For base cabinets, 2 to 3 inches from the top corner gives a balanced look. Face-frame cabinets should align hardware with the frame, while frameless cabinets use the door edge as the reference point.
On Drawer Fronts
Center single knobs on small drawers. For wide drawers, use two pulls positioned at the one-third and two-thirds points of the drawer width. For deep drawers, handles can be centered vertically or placed slightly higher for comfort.
Tips for Accurate Marking
Use painter’s tape and a pencil to mark positions clearly. Templates or DIY jigs ensure uniform placement across all cabinets. Always double-check measurements before drilling.
Step-by-Step Installation
Remove Old Hardware
If replacing handles, remove old ones carefully. Fill any unused holes with wood filler if necessary. Mark new hole positions using your template or jig.
Drilling the Holes
Drill carefully through the tape to prevent chipping. Use a sharp 3/16-inch bit and drill straight. Support the door or drawer to avoid splintering.
Attaching Handles or Pulls
Before attaching, ensure you have the correct screw length for your cabinet doors or drawers. Use a measuring tape to measure the depth of your panel where the screw will go. Add ¼” to that depth — this is the ideal screw length. When using breakaway screws (which can be snapped at set intervals), match your measured length to the nearest breaking point. If your measurement falls between two breaking points, choose the one closer to the head of the screw. It is better to have a screw that fits exactly or is slightly shorter, rather than too long, to ensure your hardware aligns perfectly.
To cut a breakaway screw: hold it vertically with one pair of pliers just above the breaking point. Use a second pair of pliers to gently bend the screw back and forth at the desired break until it snaps cleanly. If using standard screws, skip this step.
Now hold the handle or pull in place and insert the screws from the back of the cabinet. Tighten carefully by hand to avoid stripping. For two-screw pulls, align them evenly before fully tightening.
Final Adjustments
Remove tape, clean off pencil marks, and check your alignment. Handles should be level and consistent across all cabinets. Do a quick tug test to confirm they are secure.
Special Tips for Face-Frame vs. Frameless Cabinets
Face-frame cabinets benefit from centering hardware on the frame. Frameless cabinets use edge-based measurements. The goal is consistent and ergonomic placement regardless of cabinet style.
Pro Tips and Common Mistakes to Avoid
Always measure twice and drill once. Make sure doors and drawers are level before marking. Test hardware placement with painter’s tape before committing. Avoid overtightening screws, and select the correct screw length for a flush fit. Maintain symmetry across all cabinets for a polished look.
Tip: Do not twist the knob or pull directly from the outside to remove it. This might cause the screw insert to come loose and damage the product.
Tip: Use a screwdriver (not a drill!) to screw in your new knob or pull and its mounting screw(s) in the existing door or drawer hole. Remember to use the screwdriver to tighten the screw(s) from the inside instead of twisting the knob or pull directly.
Tip: Avoid over tightening the screw, as this can cause splintering or damage to your cabinets.
Conclusion
With the right tools, accurate measurements, and these pro tips, anyone can achieve a professional-looking cabinet hardware installation. Handles and pulls add personality to your kitchen or bath in just a few hours. Take your time, enjoy the process, and admire your refreshed space!
Safely store your old knob and/or pull and screws for a rainy day (or for when you move out).
That's it! Enjoy your new vibe.